header info

To see what jewelry creations are currently available Click here!

Wednesday, July 11, 2012

New Pieces in Cold Enamel and Resin

Took some time off to get my assistant up and running (listing supplies I no longer need or simply have too much of). Those items, btw, are in my Etsy store if you’re interested.

Taking care of lots of other odds and ends, but now starting to go stir-crazy for some jewelry making.

Did a little experimenting with resin…


And then resin and enamels…


And other odds and ends…


Made one ancient Egyptian-style necklace that’s actually listed for $9.99 at the moment…


I’ll keep you posted with any of my upcoming experiments.

Thursday, June 14, 2012

Continued Experiments in Enameling

I do the counter-enamel first, using a torch (it’s just easier).


Normally, I like to torch until the enamel is smooth (past the sugar stage, past the orange peel stage). But my logic for not taking it to the smooth stage for these counter-enamels was that if my piece is going into the kiln anyway… and this already enameled side is facing the hottest part of the kiln… then I don’t need to take the first enameling (flux… aka clear counter-enamel base coat) to the “smooth” stage. I can leave it somewhere between the sugar and orange peel stages since it’s going to get fired again when I put the piece into the kiln for the front enamel coats.

These are today’s test pieces after counter-enameling (you’re looking at the backs of the charms; they have one coat of flux on them).


You see more solder on some than others because I was trying out different ways of soldering.

These are the fronts of those same pieces. This is after firing (and after cooling). This is what the direct flame did to unprotected copper.


And the same fronts after I cleaned them (you have to clean the metal before you enamel it… and that includes cleaning between stages of enameling.


BTW, here are my handy (and well-labeled) mist bottles. I go through gallons of distilled water in my workshop. But you don’t want to get your distilled water mixed up with your KlyrFire.


So I took test pieces 1 and 2 and added some cloisonné wire as well as a couple balled up fine silver things. It was going to be three fine silver balls but one of them dropped into the Blu-Stic and sank to the bottom immediately.


I didn’t know some of my test pieces had pitted flux. These pieces are 17mm in diameter (about dime sized) and my close-up vision isn’t what it used to be. It wasn’t until I saw the photo close-up that I noticed the pitting. Otherwise I might have put another coat of flux on there.

I brushed the flux onto the fronts of my first two test pieces today and sifted it onto the second two.

But this brings me to another issue I need to solve. I am SO not mastering the use of KlyrFire. I realize I can’t work on flat pieces my whole life, but look at the result of brushed on KlyrFire and then sifting.


Sorry for the mega-sized photo, but I wanted you to see what it is I’m talking about. Why does it CLUMP up like snow? Bare patches, fat patches… I’d like to wonder if 80-mesh is just too fat, but it’s more likely USER error than materials error.

Anyway, here’s my first “wet-pack”.


I’m not sure how one is supposed to achieve a thin layer when wet-packing, but it’s definitely something I’ll have to practice.

And this is after firing that first layer of enamel.


And after firing with a second layer of enamel.


Here is test piece #2, after the first layer and then after the second layer as well as initial grinding down of the cloisonné wire.


I think I’m discovering that it’s infinitely easier to experiment with flat pieces rather than domed pieced. But I domed all my test pieces, so I’ll just forge ahead.

For my large piece (test piece 4), I really should have made a bigger nichrome holder, but I was impatient and just used the little one. The nichrome was touching the counter-enamel so stuck a bit (normally, the wire holder just touches the outer most edges of the piece, so no fusing of glass to nichrome wires).

And apparently I AM forced to build a new wire-holder thing in the middle of my enameling today because… duh!... the enamel that stuck to the wire when I fired my big piece… is still on the nichrome wire and thus sticking to other things (like my tweezers) when heated up.

I admit I’m not thrilled with the idea of heating nickel (which is what nichrome has in it), y’know what with the fumes and all. By that logic, however, maybe I’m not so thrilled with toasters either.

Anyway I had a thought/idea. When I torch enamel, I use a steel screen (see first photo). What if I took one of my torching screens and cut and shaped it as a trivet for my beehive? It’s worth a try.

Okay, cutting didn’t work, but freeing one of the wires from the mesh was all I needed.

Much sturdier (sorry, I didn’t get a picture… maybe next time).

This is as far as I got today. Tomorrow I’ll finishing enameling the second two test pieces and try to learn how to grind off the tops of the pieces so the cloisonné wires aren’t sticking out above the enamel and to clean off the bits of enamel that got onto my silver frames.

It doesn’t seem like much was accomplished, but that’s beginner’s enameling for you, I guess.

I’ll leave you with a photo I took the other night as the sun was setting and lighting up the sides of the Eucalyptus trees. It reminded me of a Maxfield Parrish painting so I grabbed my camera and voila!


Wednesday, June 13, 2012

First Experiments Enameling in my Ultralite Beehive Kiln

As much as I love torch-enameling, there are some limitations.

One is that I can only enamel very small pieces (well, unless I get out my very large torch, which I prefer not to do indoors).

The second and more important of the two problems is that I can only counter-enamel in black. When the flame is directly on the enamel, it turns various dark and unattractive colors. So I just use opaque black enamel which, when fired directly upon, ends up looking like opaque black enamel. But that’s limiting. Maybe you don’t always want black to be on the backside of every piece.


Insert: ultralite beehive kiln ($185)

My hope for a solution to my wish to learn kiln enameling, yet without firing up my oversized outdoor kiln. (Can’t enamel outside and no desire to run between he workroom and the patio kiln.)

This little kiln is actually mostly used for PMC, so I might give that a go at some point too.

Anyway, I needed something that could hold my work piece elevated above the kiln floor yet short enough to fit in this mini kiln. My enameling trivets are too big so I decided to fashion something from nichrome.

Seeking instant gratification, I looked up nichrome and discovered that toasters have nichrome wire in them and in perfect serendipity, we had recently purchased a new toaster and the old one was still in the garage.


The nichrome wires are the ones on the panels facing the toast… so in a 2-slot toaster, you’ve got three panels of nichrome wire (left, right and center).

Here’s the contraption I made after seeing a similar shape on Lillian Jone’s website. (Lillian Jones, btw, is the one who inspired me to try a beehive kiln for enameling in the first place.)


Here are the pieces I mentioned earlier that I’d made for testing. Copper disks with fine silver frame edges soldered on. (Yes, as you can see, I’m an amateur solderer.)


Before using one of my test pieces (these things took me a long time to make!), I took just a plain copper disk and prepped it for enameling.

So here’s the exciting, good news: I did achieve a clear counter-enamel coating on the back sides of both my test pieces. I’m so happy about these I can’t stop staring at them and smiling.


After counter-enameling on my plain copper disk, I sifted some opaque yellow onto the top side, placed it on my little nichrome wires, and placed it in the kiln.

After a few minutes, I removed it and although the enamel was smooth, the color was gray. I admit this surprised me a bit.

I sifted another coat of yellow on top of the gray coat and scratched a few wannabe sgraffito lines into that coat, then fired.


At least it came out yellow this time.

Next I took one of the test pieces that I messed up on (when doming it I distorted the copper in one place) and after counter-enameling the back (see above), I brushed some 50/50 klyrfire (because of the dome shape) on the top, sifted opaque red, and placed it in the kiln.

After it cooled, I repeated the red enamel.

So here’s the bad news…


What is up with the black/dark patches? It *may* be a combination of the copper base and too thin layers of enamel, but I thought I had pretty thick layers.  I admit I've not found as even a coating when using klyrfire as when merely sifting the enamel.

Well, that’s the end of my first experiments enameling with a kiln.

I want to eventually get some fatter gauge nichrome wire. My little contraption was pretty flimsy, making it hard for me to get the piece into and out of the kiln.

Monday, June 11, 2012

More Bronze Metal Clay Firing and Then Starting on Solding and Enameling

I want to say a big thank you to Hadar who continues to answer my questions in this process of learning more ins and outs of metal clay and firing schedules.

Round 6:

Decided to fire my next crop circle, which is much larger and much thicker than my test pieces.

The set-up…
Media: bronze with copper inlay, thick and larger piece
Kiln: top loading brick
Firing Container: round fiber firing container, no lid for phase 2
Charcoal: coconut shell carbon, acid washed
Phase 1 Firing: camp-stove for 45 minutes
Phase 2 Firing: full ramp to 1300 external pyrometer reading (kiln setting 1200), hold for 2 hours

I rigged a little collar of tin foil above the campstove knob and below the gas outlet. After 45 minutes of maximum heat, neither the knob nor the top of the propane canister were hot.


So I sat there for 45 minutes, watching my fiber box heat up, but never saw the “binder burning off” smoke. Which also means I never lowered the temp to minimum.

Since this is a much larger piece than my test pieces, I was expecting MORE smoke, not less. The only thing I can think of is that this piece sat on my shelf for a month; maybe that changed things.

I did smell the same smell as when the previous pieces were burning their binder, so after 45 minutes I looked and the piece was black. I decided to go ahead and transfer it to the kiln for phase 2 (two hours holding time at 1300 degrees).

I anticipated a not-fully sintered piece. After all, my first crop circle, fired at a much higher temp wasn’t sintered in the first go ‘round. Why would I think firing at a LOWER temp would produce BETTER results?

So I pull the thing out of the kiln as soon as phase 2 is over (I still am not sure about the protocol on that) and see that:
A) The charcoal is not bright orange as on previous occasions, and…
B) Charcoal bits are stuck to one side of my lentil


D’oh! I forgot to place it vertically rather than horizontally. Oh well, next time. And once I brushed the piece, there was only one piece of charcoal stuck to it and I didn’t see any pitting.

Although there is no warping or blistering (yay!), the copper inlay appears unsintered in spots...


... so I applied more copper clay and re-fire phase two.

Out of the kiln for the second time… brass brush with water, then sanding through all the grits (400, 600, 1000, 2000, 3000, 4000), then Baldwin’s patina and voila! New crop circle is done (and I really love it). I’m trying to add a chain and get it photographed so I can list it tomorrow (along with a Cleopatra style beaded necklace made last week… and just chillin’ on the mannequin).

After oohing and ahing over my crop circle, I got side-tracked with soldering and enameling. I made five bases (places for me to enamel). They are copper disks with fine silver frame edging (I like something that HOLDS the enamel in).

Today was cut out copper shapes, fuse fine silver into rings, shape rings, clean copper and silver, solder rings to disks, pickle, rinse, file and hole punch.

Tomorrow the plan is to clean the metal again, counter-enamel, add base coat enamel, add cloisonné wires, wet pack enamel, fire, repeat, finish.

It will be my first time trying to apply a counter-enamel that isn’t black. :-)

Sunday, June 10, 2012

Miniature Koi Pond Necklace and Comparison Shopping for Sterling Silver Clasps

Worked on some soldering last week. Was going to make a domed pendant that could be enameled, but here’s what happened to the dome:


As a fellow jewelry artist helpfully pointed out, the reason my silver solder jumped from the crevice (where it was … in front there, between the copper dome and the flat copper square) to the front of my dome is because the dome got hotter faster than the square, so the solder went to the hot spot… the dome. D’oh!

Seems to clear now, but at the time I was just so focused on other things. So next time I do this, I place my piece on a trivet or tripod screen and fire from underneath.

Thank you, JF!

Anyway, I did end up soldering that spot, but was still upset about the silver now fused to my copper dome, so I threw the piece in the pickle pot and went to bed.

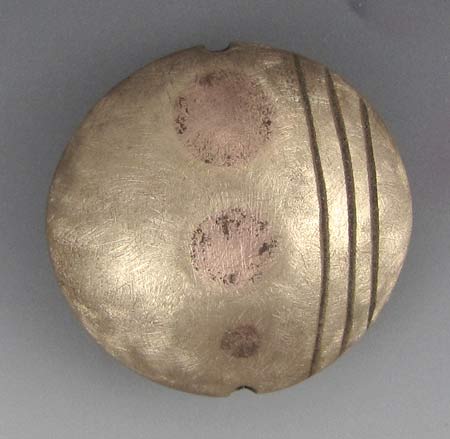
Next morning I take the piece out and look it over and decide that the reverse side of it looks like a little pond. So I make three miniscule koi and place them at different levels in the pond using layers of resin, and voila!


While I’m waiting for the kiln to finish, let’s do a little comparison shopping.

16mm sterling silver tube clasp and 22mm sterling silver tube clasp

These are the kind I use on my netted weave bracelets:


Firemountain: 16mm is N/A, 22mm is $36.63
Beadaholique: 16mm is N/A, 22mm is $15.59
ArtBeads: 16mm is $9.49, 22mm is $11.17
JTV: 16mm is $8.99, 22mm is $10.99
Bluemud: 16mm is $8.96, 22mm is $10.30
FusionBeads: 16mm is $8.53, $10.56
House of Gems: 16mm is $8.17, $9.74
MonsterSlayer: 16mm is $8.00, 22mm is $10.05
RioGrande: 16mm is $6.24, 22mm is $7.52
Esslinger: 16mm is $5.90, 22mm is $8.40
Halstead: 16mm is $5.11, 22mm is $5.75
Thunderbird: 16mm is $4.81, 22mm $6.39

I ended up ordering from Rio because I got a wicked discount for ordering 5 (which was how many I needed). Got the 22mm for $6.08 each.

Tomorrow back to metal clay stuff.