
My days of late have been filled to the brim. Right now I feel like SRAJD stuff is my full-time job, but I anticipate that will die down soon.
I “taught” my first metal clay class last Friday. I had the best “students” ever. Yes, I’m putting “teaching” and “students” in quotations because it wasn’t an official class. But I am learning a lot about lesson planning (and other things… like time management).
Our first class was steel metal clay. The girls are SOOO talented. Here’s a photo of the very first pieces. Mind you, the funky one in the lower right corner is mine, a complete copy from one of the students. Ha ha ha! I hope she didn’t mind. I saw her doing circles and I thought, “That’s a great idea… I’d like to try.” I also discovered that I have a hard time working and talking at the same time.

And still on the teaching front… I have my set-up and training finished and am ready to start preparing my first eclass for CraftArtEdu. I’m so excited about working with these fantastic people and this great website. What an honor.
I will definitely post here when I have my first class up and running.
The Process
So here’s what I managed to sqeeze in, work-wise, over the last week or so.
I spent a lot of time working with steel because I was preparing for that first class. I made a quilted oval pendant and that’s what we used as our platform for the class.

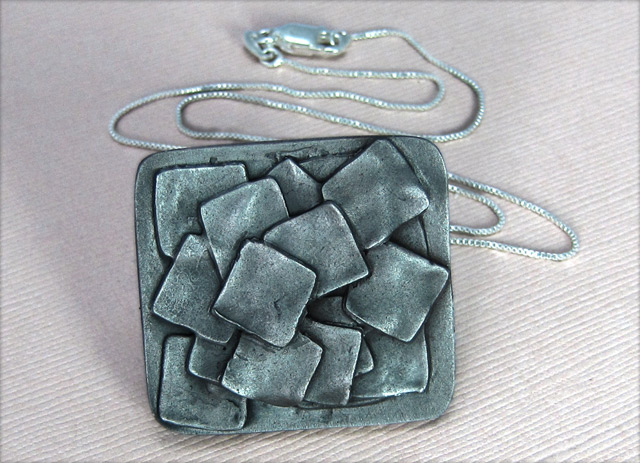
Then I was going to make a piece that had a backing and the onlay was supposed to be a negative space circle with a circle cut texture in the center. But I think my clay was too soft/wet and when I tried to transfer my shapes to the backing layer they got all distorted and didn’t fit together.
Then I tried to salvage the piece because, hey I still had a decent backing layer. I couldn’t remove the only smoothly so I had quite the mess, then I just started cutting small squares and layered them on there and ended up with a design I love.
After that I practiced rings. Very simple rings. One wide-band textured ring.

And one smaller ring that I used my linoleum cutter to carve some line design into.

BTW, if you’re curious how I photographed the rings, here is my set-up.

Fishing string on a third hand, holding the ring up at an angle on my gradient paper.
And I finally finished this piece…

(That was the greenware stage.) I fired and polished it then put colored resin in the bubbles. I decided to use matching colored stones and seed beads for the strands and voila!


Recently, I got a smidge concerned about the residue left in the kiln after firing in a steel bowl…

… so I decided to try my ceramic fiber bowl again.
This is the one I have. It’s made of ceramic fiber.

Hadar warned me that it retains the heat longer than a steel vessel, but I had no idea.
I was doing a double-firing schedule. Fire at temp and hold for an hour, then cool the kiln and bowl to room temp and fire a second time.
At the end of the first firing, I removed the bowl from the kiln so it could cool faster. At that point, the carbon has some ash on top, but the carbon was still at a level maybe about ¼ inch below the rim.
After two hours, there was still so much heat emanating from the top of the bowl I couldn’t hold my hand above it. And look… the carbon continued to burn (out in the ambient air) so much so that it had now sunk to about 1½ inches below the rim (having turned into ash) and my pieces were exposed.

At this point, I got a steel bowl, added an inch of clean carbon, gently removed my pieces from the fiber bowl, placed them in the steel bowl, covered them with a layer of carbon and finished the double firing.
Eight hours after I’d removed the fiber bowl from the kiln, there was no carbon left. It had all burnt up and turned to ash. Talk about retaining heat!
The pieces ended up fine. They’re in my test pieces box. For now, though, I’m going to stick with the steel vessels. But someone suggested these. I hope to try one soon.
MISC
Here are the blog stats for one day of my blog.

I can’t tell you how surprised I am to see the TINY proportion of Mac users to Windows users. I would have thought at least half the general population are Mac users. If I had some mad money, I’d definitely consider getting a Mac. But since I’ve never used one, I can’t say which I’d like more.
I was also surprised to see how many people use Internet Explorer. I personally use Chrome for the majority of my work, but switch to Firefox for some things that Chrome won’t do (weird).
As a research and numbers geek, I love looking at stats. They rarely mean anything, but it’s still fun to look.
Oh look… the first tomatoes from our garden!

Until next time…


