header info

To see what jewelry creations are currently available Click here!

Monday, December 17, 2012

Test Firing Metal Clay Pieces and The First Pendant

Here we are again. Today I have the results of the 2nd test firing.


Steel and copper seems to be a match made in heaven. Bronze XT seems to shrink a lot so I might have to be careful how I use it in combination with the other two metals.

I’m not sure why my copper and bronze look so similar, even after the application of Baldwin’s patina.

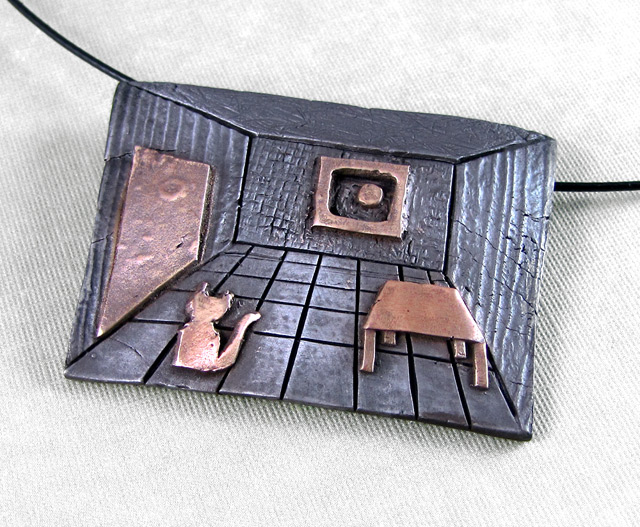
Anyway, this gave me the courage to try firing one of my pendants. The pendant is wavy with a base of copper and an overlay frame of Bronze XT.

Since one of the bronze test pieces was a little blistered (you can’t see that in the photo because I ground off the blisters), I decided to lower the temperature from 1700 to 1680.

Alas, that hardly mattered since I didn’t do Phase 1 completely. The areas of the pendant that point downward (remember, this is a wavy piece) and were therefore much more in the charcoal that the rest of the pendant did not get sintered.

Lesson learned… I will keep pieces like that in Phase 1 firing for additional time rather than relying solely on the end of the binder-burning smoke and the change of the pieces from brown to black.

So here’s the front of the pendant right out of the kiln after phase 2.


And here’s the back, again right out of the kiln after phase 2.


Then I took a radial disk dremel to the front.


And the back, where you can see the obvious signs of non-sintered metal clay.


Back to it tomorrow with renewed enthusiasm.

As to new listings, I did put the pair of fine silver basket weave earrings up for sale.


And here’s a custom order I did.


Oh, I don’t think I ever showed you my last two enamel pendants.


Okay, talk soon!

Sunday, December 16, 2012

The Failed Metal Clay Firing

I like to periodically check on my klin during a firing. It’s kind of like watching a pot of water you want to boil… or maybe more like waiting for Santa on Christmas morning. Although lately it’s also because I fear some malfunction may take hold of the kiln. Hey, it only takes one to set me on edge, and I did have my one earlier this year.

So about halfway through my firing yesterday I go out and check on the kiln and freak when I see that the temp is 1902. Wwwwwwwwaaaa! I guess I wasn’t focusing when I programmed it and I meant to do a full ramp to 1650 and hold for two hours. Instead, I just killed all my test pieces.

But I wanted to show you because I thought it was interesting that they didn’t die evenly.


At first when I saw the little buttons, I thought those were the inserts of the test pieces that had melted up into a ball and fallen out of the outer frame. But then I did a head count and realized that each of those pieces represent one of the twelve test pieces that entered the kiln.

The good news is (if I’m correct in my thinking) is that at least they sintered. I ran a sanding tool over several of them and saw no powdery spots.

It seems like steel can take the most damage, followed by copper, and lastly bronze. As you can see, the “copper in steel” and “steel in copper” pieces actually survived this ridiculous firing. Any “mess” you see was most likely pre-firing mess so doesn’t count (dimples, uneven areas, gaps, etc).

For the “bronze in steel”, the steel remained, but the bronze fell out and disappeared.

The rest (“copper in bronze”, “bronze in copper”, “steel in bronze”) balled up into melty dots.

As I write this, I have batch #2 in the kiln. Fingers crossed it was MY error with the kiln yesterday rather than some kiln malfunction.

I will keep you posted.

Not sure if I already mentioned that I’m working on a project to thin out my bead stash, so the items in the supplies section of my Etsy store will constantly be added to.

I really enjoy beads. I enjoy looking at them, holding them, and yes… still making things with them. So every once in a while, instead of listing some beads, I grab some beading thread and whip out a piece.

This first one sold already, but if you click on the other photos, you can get more details.


Saturday, December 15, 2012

Intensive Metal Clay Class with Hadar Jacobson

Looks like I haven’t worked with metal clay since June. That’s when I put the deposit on Hadar’s 5-day intensive.

So here I am, having at it again.

Here are the items I made in Hadar’s class (click any of the photos to see more details).

First we worked on perspective rooms made from steel with bronze and copper accents.


Then we had options for structural/architectural rings. I chose the castle.


The castle was not only a high-fire (1700°F), but was fired twice (repairs were made after the first firing). And although the CZ (the inset stone) changed from orange to purple, we were all surprised to see that it survived at all.

The next project was another choice or rings. I chose the ones that look like little hobbit houses. Here’s what I made.


I then made two other pieces in class because it was using a technique I wanted to learn, but we didn’t have time to fire them as it was the last day so I brought them home to fire here.

But first I’m running some tests. Yes, I know… I did this practically all summer, but I’d like to get a good, easy working system going.

Here are today’s test pieces. These are all high-fire. It’s various combos of steel, bronze, and copper.


I will (obviously) let you know how it goes.

As an aside, here are more Penryn photos.

Here’s about half of the deer family/herd/tribe that visit us daily.


Sometimes they just chill on the lawn.


We’ve had some lovely sunsets lately. The photographs don’t do them justice but I try.